Integrating Apple Push notifications functionality in Scala
Recently i’ve implemented the Apple push notification functionality in our application. Its just a few lines of code and you’ll find it in action.
Go through this , one of the good blog for getting the Apple’s certificates and other required stuff ready.
(i’m being lazy i know 😉 but the above specified blog is enough i think for getting the certificate & other stuff ready)
Once you’ve private key file & certificate with you , select both of them together and export it as .p12 file. You’ll be prompted for a pass-phrase , enter the pass-phrase and export the file (Remember this pass-phrase)
Now you’ve :
1. .p12 file.
2. Pass-phrase in your mind.
Lets write the code :
A. Add this dependency in your build.sbt ( or in appropriate) file
"com.notnoop.apns" % "apns" % "0.1.6"
B. Prepare the APNS service as :
val service = APNS.newService.withCert("APNSCertPath", "APNSCertPassword").withSandboxDestination.build
Here APNSCertPath is being referred to the above created .p12 file path & APNSCertPassword is the pass-phrase that you’ve given while exporting that .p12 file.
(Good news we’re near to be done with code 🙂 )
C. Lets create the payload (The data we want to send in the push notification)
val payload = APNS.newPayload.alertBody("msgToSend").build
D. We can add other attributes for the things like Sound , Badge , Custom Data etc.
val payload=APNS.newPayload.alertBody("msgToSend").badge(1).sound("default").customField("myField","myFieldValue")
build
E. Lets push the notification to device.
service.push(deviceToken, payload)
And we’re done !
Go ahead. Write a test case & test it.
@Test
  def testAPNSPush {
    log info "Starting..."
    val APNSCertPath = "/home/neelkanth/Desktop/cert.p12"
    val APNSCertPassword = "**********"
    val service = APNS.newService
      .withCert(APNSCertPath, APNSCertPassword).withSandboxDestination.build
    log debug s"Build The Service........."
    val payload = APNS.newPayload.alertBody("Hello From Neelkanth Sachdeva").badge(1).sound("default").customField("name", "neel").build
    log debug s"Build The Payload........."
    val token = "<<<<<<<<<<<<<<<<<<<<<<---Device Token--->>>>>>>>>>>>>>>>>>>>>>"
    val notif = service.push(token, payload)
    log debug s"Result Received Is $notif"
  }
Cheers 🙂
Training on Play Framework at Scala Traits Event by Knoldus Software LLP
We had a great & successful Scala Traits Event at Hotel Regent Grand on last Saturday. I’ve presented on Play Framework. My Presentation has got three modules from basic Play learning to deploying the application. Now this fruit is here as well.
Integrating Google Drive infrastructure in Play Scala application
This blog talks about integrating the Google Drive infrastructure in our Play Scala application as like Assembla and some others. We used oauth2 in order to communicate with the Google using Access Token and Refresh Token. Let us see the process step by step.
1. Prepare the browser request URL in order to get the authorization code.
val redirectURI = "http://localhost:9000/driveAuth"

  def authenticateToGoogle = Action { implicit request =>
    val urlToRedirect = new GoogleBrowserClientRequestUrl("Client ID", redirectURI, Arrays.asList("https://www.googleapis.com/auth/userinfo.email", "https://www.googleapis.com/auth/userinfo.profile", "https://www.googleapis.com/auth/drive")).set("access_type", "offline").set("response_type", "code").build()
    Redirect(urlToRedirect)
  }
Parameters required by this URL :
ClientId : Your Google application’s client Id. Looks like xxxxxxxxxxxx.apps.googleusercontent.com
Redirect URI : The registered URI with the application.
Scopes : : Specific information type that you want to demand from user.
Access Type : Should be set as “offline”.
Response Type : Should be set as “code” as we are demanding the authorization code. This code will be exchanged for the access token and the one time refresh token.
2. When the users will hit this url , they’ll be asked to Log in and allowing the application to access of their Google Drive’s documents and the other basic information (Depends upon the scope that we’ve defined in url). Once the users have successfully authenticated their Google accounts , the authorization code will be sent to the Redirect URI specified in the browser’s request url as request’s query parameter.
3. Once you receive the authorization code over the redirect uri that you’ve specified as like above , use this code for getting the Access Token and one time Refresh Token from Google by making a POST request on https://accounts.google.com/o/oauth2/token url. Again you’ve to send the basic credentials like Client_Id , Client_Secret , Redirect_URI etc along with this request.
import com.google.api.client.googleapis.auth.oauth2.GoogleCredential
import com.google.api.client.http.FileContent
import com.google.api.client.http.javanet.NetHttpTransport
import com.google.api.client.json.jackson.JacksonFactory
import com.google.api.services.drive.Drive
import com.google.api.services.drive.model.File

......................................................
......................................................

 /**
   * Google Oauth2 accessing code and exchanging it for Access & Refresh Token
   */
  def googleDriveAuthentication = Action { implicit request =>
    val code = request.queryString("code").toList(0)
    val url = "https://accounts.google.com/o/oauth2/token"
    val obj = new URL(url)
    val con = obj.openConnection().asInstanceOf[HttpsURLConnection]

    con.setRequestMethod("POST");
    con.setRequestProperty("User-Agent", USER_AGENT);
    con.setRequestProperty("Accept-Language", "en-US,en;q=0.5");

    val urlParameters = "code=" + code + "&client_id=************.apps.googleusercontent.com&client_secret=xxxxxxxxxx&redirect_uri=http://localhost:9000/driveAuth&grant_type=authorization_code&Content-Type=application/x-www-form-urlencoded";
    con.setDoOutput(true)
    val wr = new DataOutputStream(con.getOutputStream)
    wr.writeBytes(urlParameters)
    wr.flush
    wr.close
    val in = new BufferedReader(
      new InputStreamReader(con.getInputStream))
    val response = new StringBuffer

    while (in.readLine != null) {
      response.append(in.readLine)
    }
    in.close
    Ok
}
You’ll get the following data in response.
"access_token" : "ya29.AHES6ZSyNMy0btyYrYflOPkYGEF6ijCKjCASjYoxK5CuqHPOHLDG0og", "expires_in" : 3600, "refresh_token" : "1/U33p2VTgqIqtll2P43x6PVen156ys0EMGcrkYW4lYuMI"
5. Extract out the access token and the refresh token from the response.
Refresh token will be obtained only first time when the user will allow the access to their information. Don’t forget to save it in to your database. Next time when you’ll generate access token using this refresh token.
6. Now we are having access token so its time to set the Google credentials in order to make the Drive ready.
 val CLIENT_ID = "************.apps.googleusercontent.com"
  val CLIENT_SECRET = "****************"
  val httpTransport = new NetHttpTransport
  val jsonFactory = new JacksonFactory
  /**
   * Set Up Google App Credentials
   */
  def prepareGoogleDrive(accessToken: String): Drive = {

    //Build the Google credentials and make the Drive ready to interact
    val credential = new GoogleCredential.Builder()
      .setJsonFactory(jsonFactory)
      .setTransport(httpTransport)
      .setClientSecrets(CLIENT_ID, CLIENT_SECRET)
      .build();
    credential.setAccessToken(accessToken);
    //Create a new authorized API client
    new Drive.Builder(httpTransport, jsonFactory, credential).build()
  }
7. Now our Drive is ready. We can now upload the documents or fetch all the documents of a user’s Google drive and more depending upon the scope defined. Below is how you’ve to upload a file to Google drive and viewing the already existing files of a user.
/**
   * Upload To Google Drive
   */
  def uploadToGoogleDrive(accessToken: String, fileToUpload: java.io.File, fileName: String, contentType: String): String = {
    val service = prepareGoogleDrive(accessToken)
    //Insert a file
    val body = new File
    body.setTitle(fileName)
    body.setDescription(fileName)
    body.setMimeType(contentType)
    val fileContent: java.io.File = fileToUpload
    val mediaContent = new FileContent(contentType, fileContent)
    //Inserting the files
    val file = service.files.insert(body, mediaContent).execute()
    file.getId

  }
  /**
   * Get All Files From Google Drive
   */

  def getAllDocumentsFromGoogleDocs(code: String): List[(String, String)] = {
    val service = prepareGoogleDrive(code)
    var result: List[File] = Nil
    val request = service.files.list

    do {
      val files = request.execute
      result ++= (files.getItems)
      request.setPageToken(files.getNextPageToken)
    } while (request.getPageToken() != null && request.getPageToken().length() > 0)

    result map {
      case a => (a.getOriginalFilename, a.getAlternateLink)
    }
  }
8. Next time when the user will Log in to the system , you’d having refresh token already of the Google account of that particular user. You can use this refresh token in order to generate the new access token for the communication with user’s Google drive. Here is how you can generate the new access token from the previously existing refresh token.
/**
   * Get Access token Using refresh Token
   */

  def getNewAccessToken(refreshToken: String):String = {
    val credentialBuilder = new GoogleCredential.Builder()
      .setTransport(httpTransport).setJsonFactory(jsonFactory)
      .setClientSecrets(CLIENT_ID, CLIENT_SECRET);

    val credential = credentialBuilder.build()
    credential.setRefreshToken(refreshToken)
    credential.refreshToken()
    credential.getAccessToken
  }
This is the pretty straightforward way of how you can communicate with the Google Drive. Thank you folks !
Quick Tip : How to make Jetty webserver listen on port 80 as a non-root user
We had a requirement to run an application on a different port which was running at port 8080 (Jetty) by default . One of our Lift application was running at port 8080 on Linux (Ubuntu 13.04 ) machine. We wanted to run it at port 80. Usually on Linux machines, port 80 is protected. Typically only the superuser root can open it and ports below 1024 can be opened only by root. Here is how we did it as a normal user ( Non-root user) :
1. Install Xinetd .
apt-get install xinetd
2. Go to /etc/xinetd.d/ and create a new file say redirect_file and put these contents in this file
service my_redirector_80
{
 disable = no
 socket_type = stream
 protocol = tcp
 user = root
 wait = no
 port = 80
 redirect = localhost 8080
 type = UNLISTED
}
3. Restart the xinetd service as :
service xinetd restart
4. This is all you’ve to do. Now you should be able to find the application running ( which is running at port 8080 ) on port 80.
Integrating Scala Code Coverage Tool (SCCT) in Play Scala project
In my last blog i’ve elaborated the steps to integrate the JaCoCo with your Play Scala project. This time we’ll learn about how to integrate the Scala Code Coverage Tool ( SCCT ) in your Play Scala project.
Just some easy steps and you’re done with SCCT integration. Lets see it in action.
1. Add the following resolvers in your plugin.sbt file.
resolvers += Classpaths.typesafeResolver

resolvers += "scct-github-repository" at "http://mtkopone.github.com/scct/maven-repo"
2. Add this sbt plugin there as well.
addSbtPlugin("reaktor" % "sbt-scct" % "0.2-SNAPSHOT")
3 . Define a lazy val for SCCT settings in your Build.scala & include the settings as below :
  lazy val scct_settings = Defaults.defaultSettings ++ Seq(ScctPlugin.instrumentSettings: _*)
  ................
  ................

  val main = PlayProject(appName, appVersion, appDependencies, mainLang = SCALA,settings = scct_settings).settings(
  testOptions in Test := Nil
  )
4. We have a model object Hello.scala in app/models & its corresponding test HelloTest.scala in test/models
5. After adding these just do :
play clean compile eclipsify run
6. Now its time to have the coverage report for our tests. Run scct:test as shown below

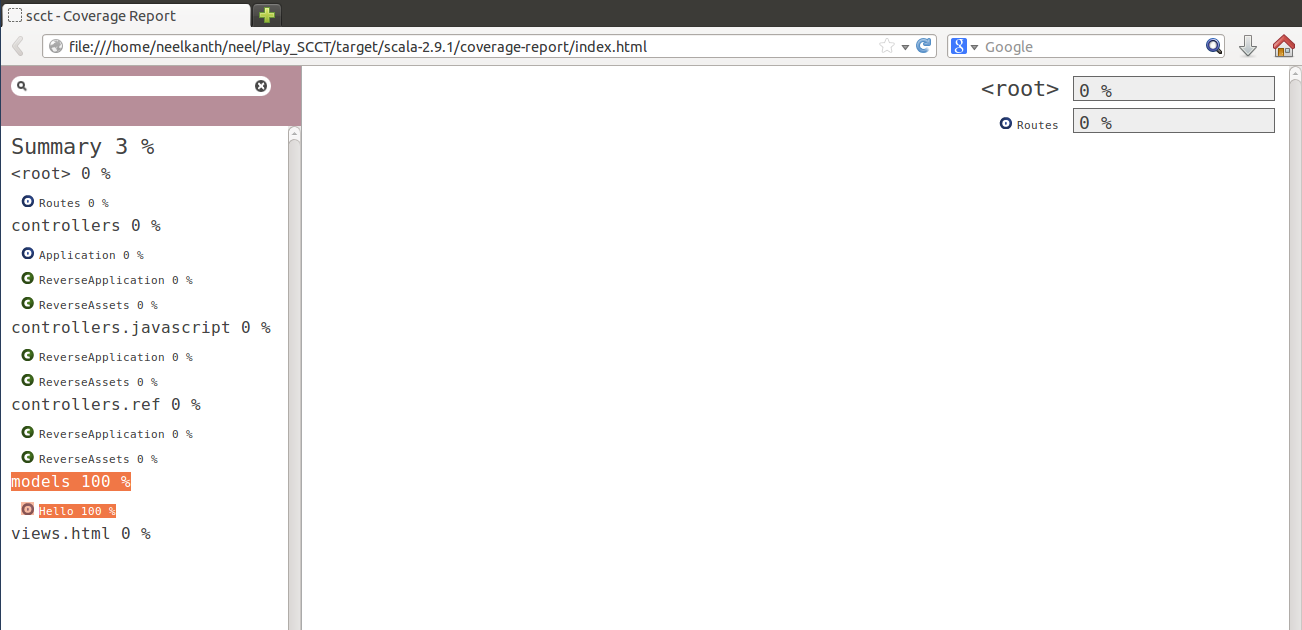
7. You’d find the test coverage report for you project in /target/scala-2.9.1/coverage-report/index.html .
Note : Open the index.html file with Firefox browser.
8. Here’s our test coverage report :
Find the code here on Github
Integrating JaCoCo in your Play Scala project
Its always good to have a fine test coverage in any project. I am working on Play framework & this time i’ve tried to integrate the JaCoCo with my play scala project & it’s cool to have it in my project.
I am going to elaborate a few easy steps to integrate the JaCoCo in Play Scala project.
1. Add the following lines of code in your plugin.sbt file. You’ve to add the plugin dependency to your project’s plugins.sbt.
libraryDependencies ++= Seq(
 	"org.jacoco" % "org.jacoco.core" % "0.5.7.201204190339" artifacts(Artifact("org.jacoco.core", "jar", "jar")),
 	"org.jacoco" % "org.jacoco.report" % "0.5.7.201204190339" artifacts(Artifact("org.jacoco.report", "jar", "jar")))

 addSbtPlugin("de.johoop" % "jacoco4sbt" % "1.2.3")
2. Have this import in your Build.scala file.
import de.johoop.jacoco4sbt.JacocoPlugin._
3. Add the following line in your Build.scala file.
lazy val jacoco_settings = Defaults.defaultSettings ++ Seq(jacoco.settings: _*)
This line adds the jacoco settings to the variable jacoco_settings.
4. Add these settings in to your Play project in Build.scala file as
 val main = PlayProject(appName, appVersion, appDependencies, mainLang = SCALA, settings = jacoco_settings).settings(
    parallelExecution in jacoco.Config := false)
parallelExecution in jacoco.Config := false makes sure that the ParallelExexution is false during testing.(Look at Point 7)
Note that we’ve a model class with name Test.scala & a test class DemoTest.scala for now.
5. That’s it. Lets run the JaCoCo with command jacoco:cover

6. You’ll find the html file with name index.html which would give you the full test report. You’ll find this file in this path /target/scala-2.9.1/jacoco/html
This is how your coverage report would look like :


7. You can check whether the parallel execution if false or not as

Get the CodeCoverage here
Pattern Matching – at a glance
I presented types of Pattern Matching at Knolx session at Knoldus. The presentation talks about the type of pattern matching in Scala with small examples.
Getting Longitude & Latitude for a address using Play Framework 2.1 WS API
This blog post serves the two purposes :
First , We’ll learn about getting the latitude & longitude for an address using Google Geocoding API.
Second , We’ll do the same as mentioned above using Play 2.1 WS API & learn about how to call the web services in Play 2.1.
On order to call the other HTTP services within Play 2.1 we use play.api.libs.ws.WS library. Calls made by using this returns scala.concurrent.Future[play.api.libs.ws.Response].
In order to get the Latitude & Longitude for a address we need to have a GET call with the following query parameters.
– address -> For which the latitude & longitude is required.
– sensor – Indicates whether or not the geocoding request comes from a device with a location sensor. Should be true here
Lets do the same by using Play 2.1 WS API.
Our GET call would looks like
WS.url("http://maps.googleapis.com/maps/api/geocode/json?address=NewDelhi&sensor=true").get()
As mentioned above the result of this GET cal would give us scala.concurrent.Future[play.api.libs.ws.Response] & we’ll map over it to get the results. The code stuff is below :
def fetchLatitudeAndLongitude(address: String): Option[(Double, Double)] = {
    implicit val timeout = Timeout(50000 milliseconds)

    // Encoded the address in order to remove the spaces from the address (spaces will be replaced by '+')
    //@purpose There should be no spaces in the parameter values for a GET request
    val addressEncoded = URLEncoder.encode(address, "UTF-8");
    val jsonContainingLatitudeAndLongitude = WS.url("http://maps.googleapis.com/maps/api/geocode/json?address=" +
    addressEncoded + "&sensor=true").get()

    val future = jsonContainingLatitudeAndLongitude map {
      response => (response.json \\ "location")
    }

    // Wait until the future completes (Specified the timeout above)

    val result = Await.result(future, timeout.duration).asInstanceOf[List[play.api.libs.json.JsObject]]

    //Fetch the values for Latitude & Longitude from the result of future
    val latitude = (result(0) \\ "lat")(0).toString.toDouble
    val longitude = (result(0) \\ "lng")(0).toString.toDouble
    Option(latitude, longitude)
  }
Lets us elaborate the process step by step :
– We’ve specified the timeout for the Future , within this duration the results from the future would be expected. (Line-2)
– Made a WS GET call with the query parameters which are address & sensor. (Line -7 )
– Let the future calculate the results & wait for the specified timeout duration. (Line 10 & 16 )
– Fetched the values of Latitude & Longitude from the result of future. (Line 19-20)
Now we are ready with our WS GET call to Google Geocoding API in order to get the latitude & longitude for the given address. Lets call the method from our Global.scala when the application starts.
override def onStart(app: Application) {
    Logger.info("Application has started.........!!!!!!")
    FetchLatitudeAndLongitudeUtil.fetchLatitudeAndLongitude("New Delhi")
  }
Here’s the output when the application starts :

We’ve used WS GET call to serve our purpose. A WS POST call looks like :
WS.url("URL").post(Map("key" -> Seq("value")))
Code for the above example can be found on Github as well.
Efficiently using Session & Flash in Play framework
Play framework is being the love of every Scala developer now a days. In this post we’ll learn about using Session & Flash scopes in Play framework.
Play has a stateless architecture so in order to keep the data across multiple HTTP request we can use Session & Flash. Session and Flash data are not stored by the server but are added to each subsequent HTTP request, using the cookie mechanism. This result in to the limitation of data size that we want to keep in Session or Flash. Generally we can store data up to 4KB in Session or Flash.
Session :
– Data stored in the Session are available during the whole user session.
– Cookie values are signed with a secret key so the client can’t modify the cookie data.
Storing the data in Session :
For the very first request we can store the values in Session as
Ok("Success").withSession("Org"-> "Knoldus Software LLP")
This’d start a new session and store the values.
For the subsequent requests in order to store more data in session you can use it like :
val sesssionToMaintain = request.session + ("location" -> "New Delhi")
Ok("Success").withSession(sesssionToMaintain)
This’d keep the previously stored values in session and would add more data in Session.
Retrieving the data from session:
"Value of 'Org' from Session : " + request.session.get("Org")
Discarding the whole session :
Ok("Bye").withNewSession
Session Expiry : Session expires when the user closes the web browser.
Flash :
– Data stored in the Flash scope are available to the next request only.
– Cookie is not signed, making it possible for the user to modify it.
Storing the data in Flash :
Redirect("/").flashing("Org"->"Knoldus Software LLP")
Retrieving the data from Flash:
"Value of 'Org' from Flash : " + request.flash.get("Org")
Retrieving the values on views :
To retrieve the Flash scope value in your view, just add an implicit with Flash:
@()(implicit flash: Flash)
 ...
 ...
 @flash.get("Org").getOrElse("No Company Found")
 ...
